
How to create Groups
Organizing trucks into groups makes monitoring easier.
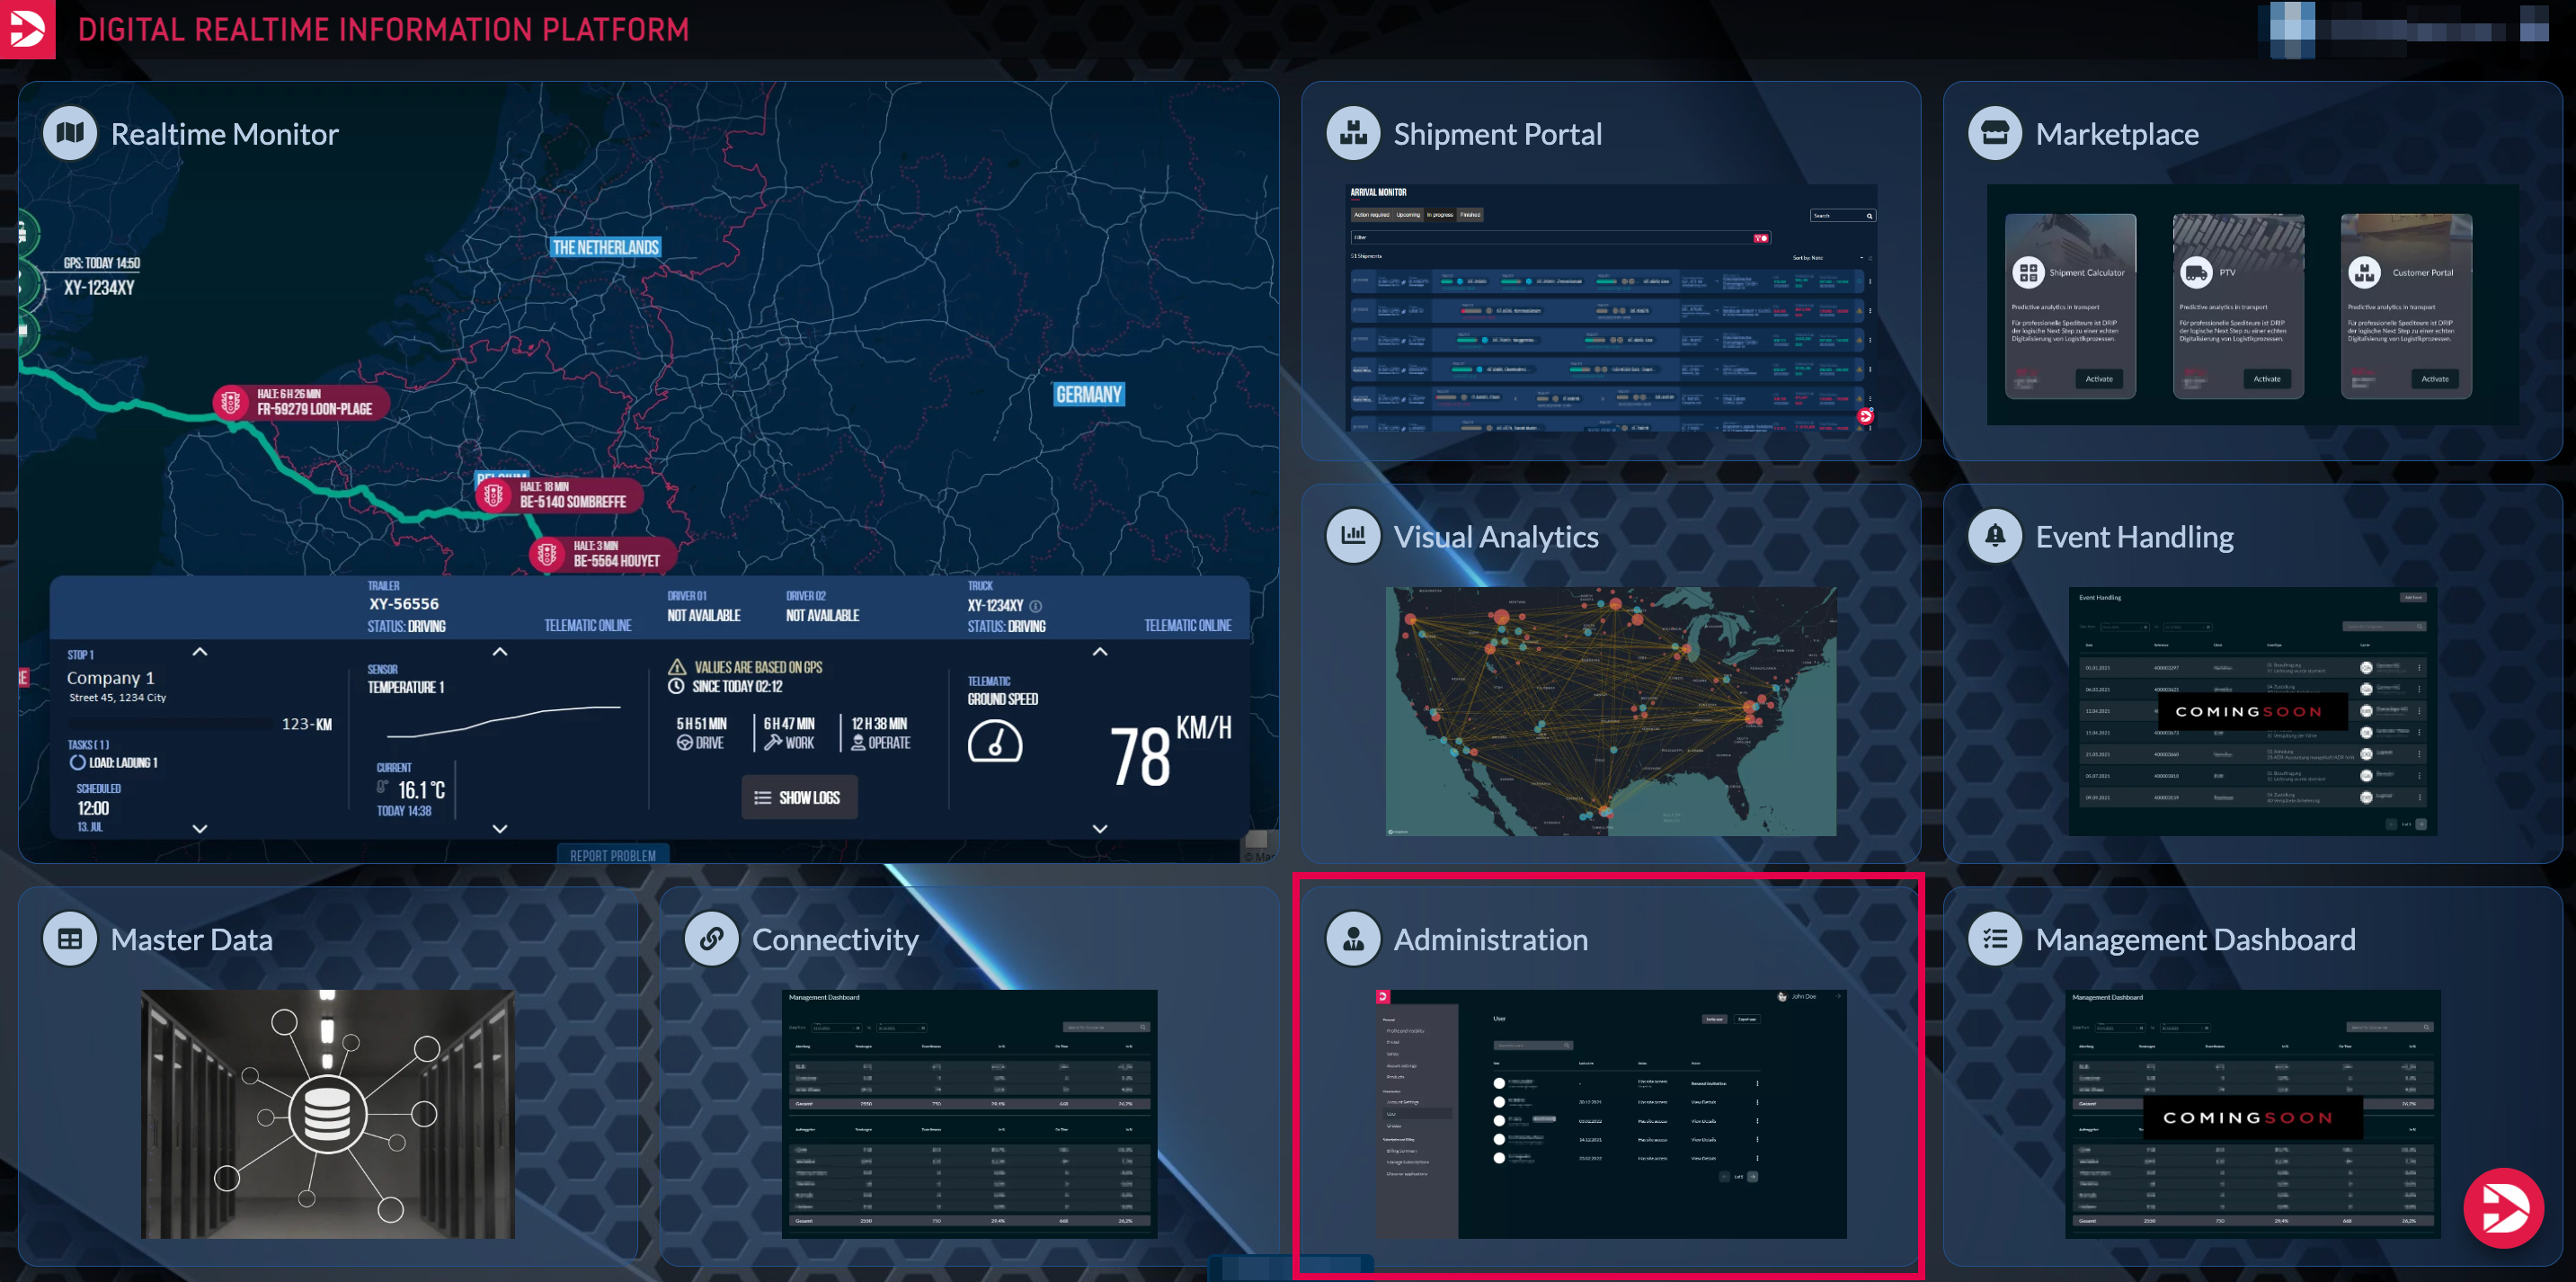
In the administration area, you have the option to create groups. To do so, select this area on the homepage.
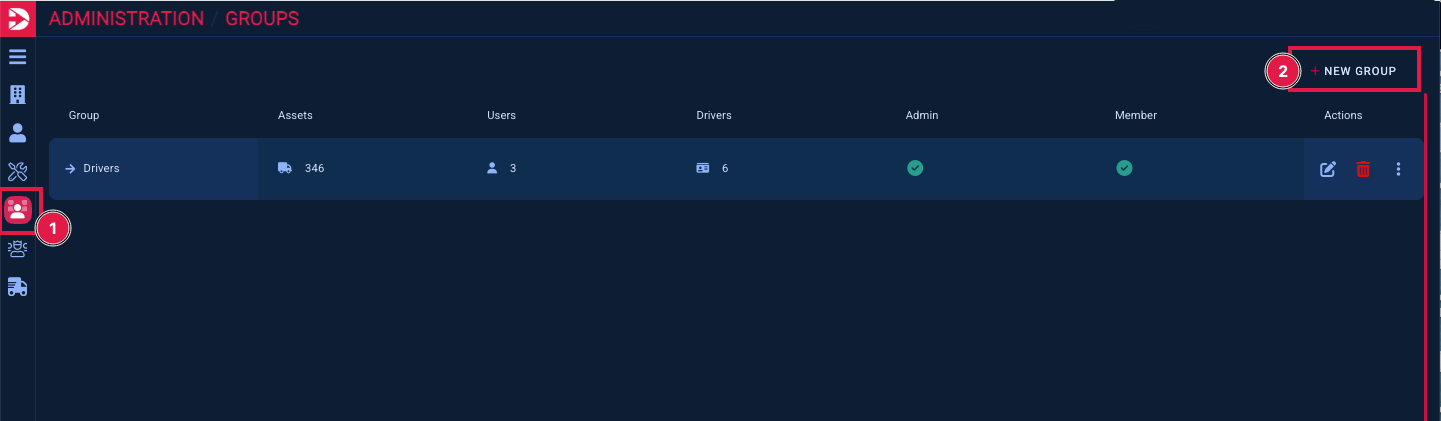
Afterwards, an overview of your company profile will open. In the left sidebar, select the “Groups” section (1) to access the respective subpage from there. Here, click on the “New Group” button (2)."
Please enter a name for the group. The description field below is optional.
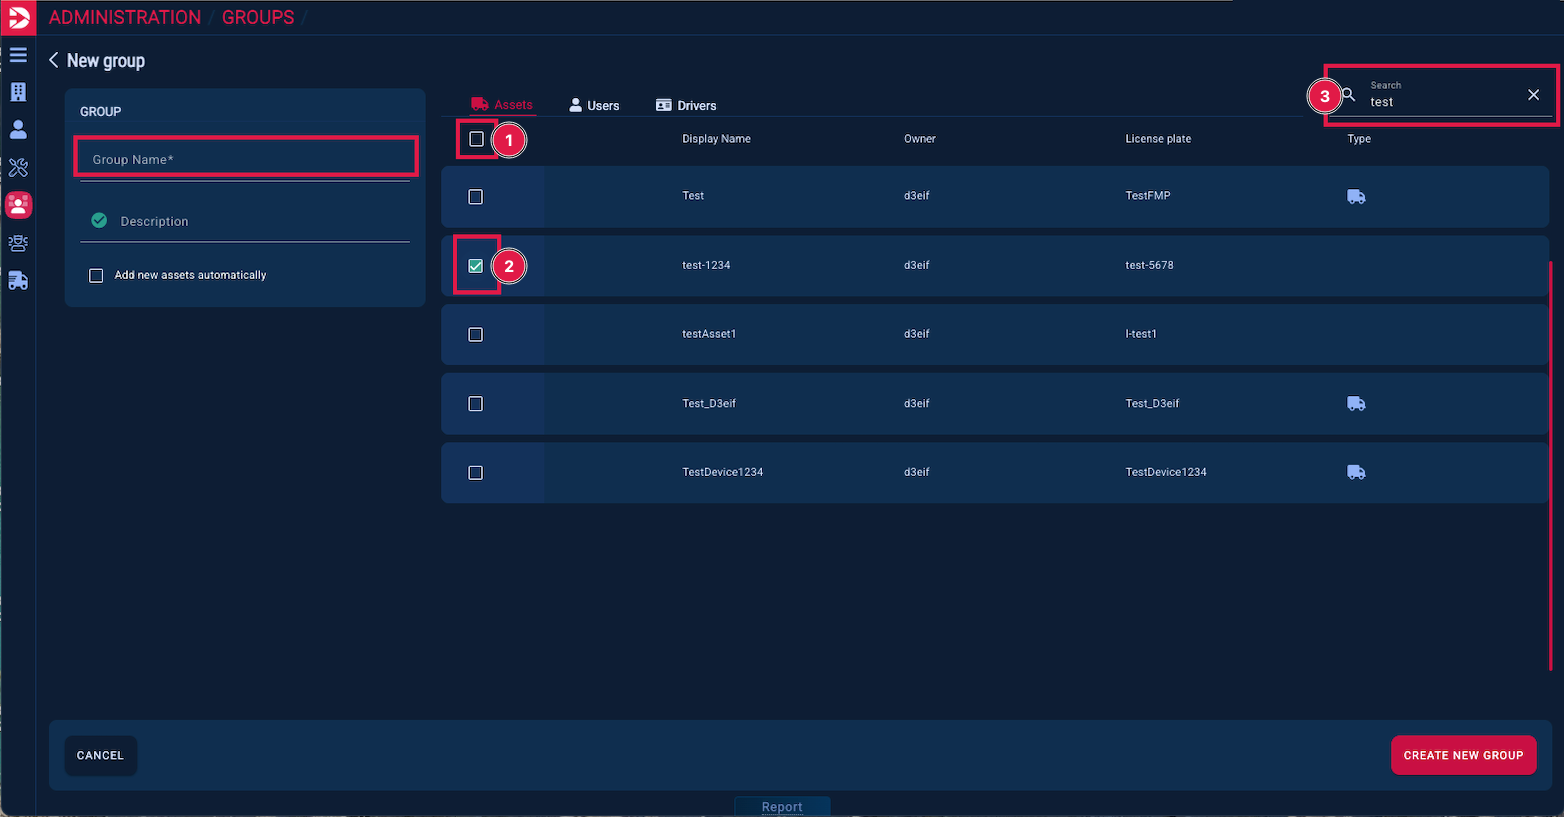
In a next step, either all (1) or selected vehicles (2) can be added to the group.
The search function (3) can be used to find individual vehicles more quickly.
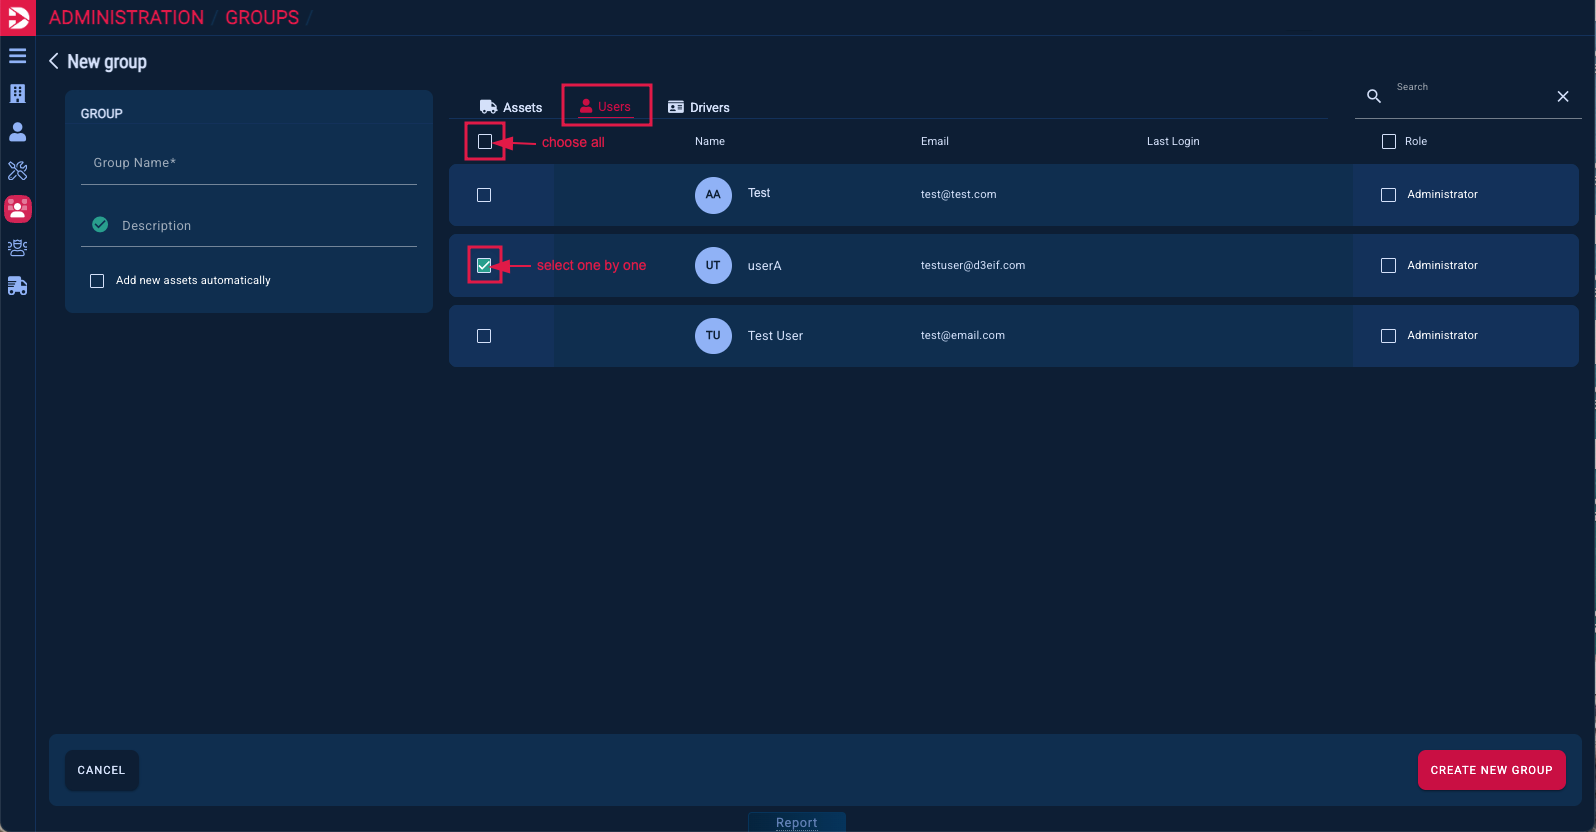
All or individual users, who have permission to view the assets in their Drip account, can be added to the group. By enabling the administrator role, the user is assigned administrator rights.
In the next step, the drivers are selected who have permission to connect with the trucks that are also in the group via their D44 app and to chat with their dispatcher (who must likewise be part of the same group).
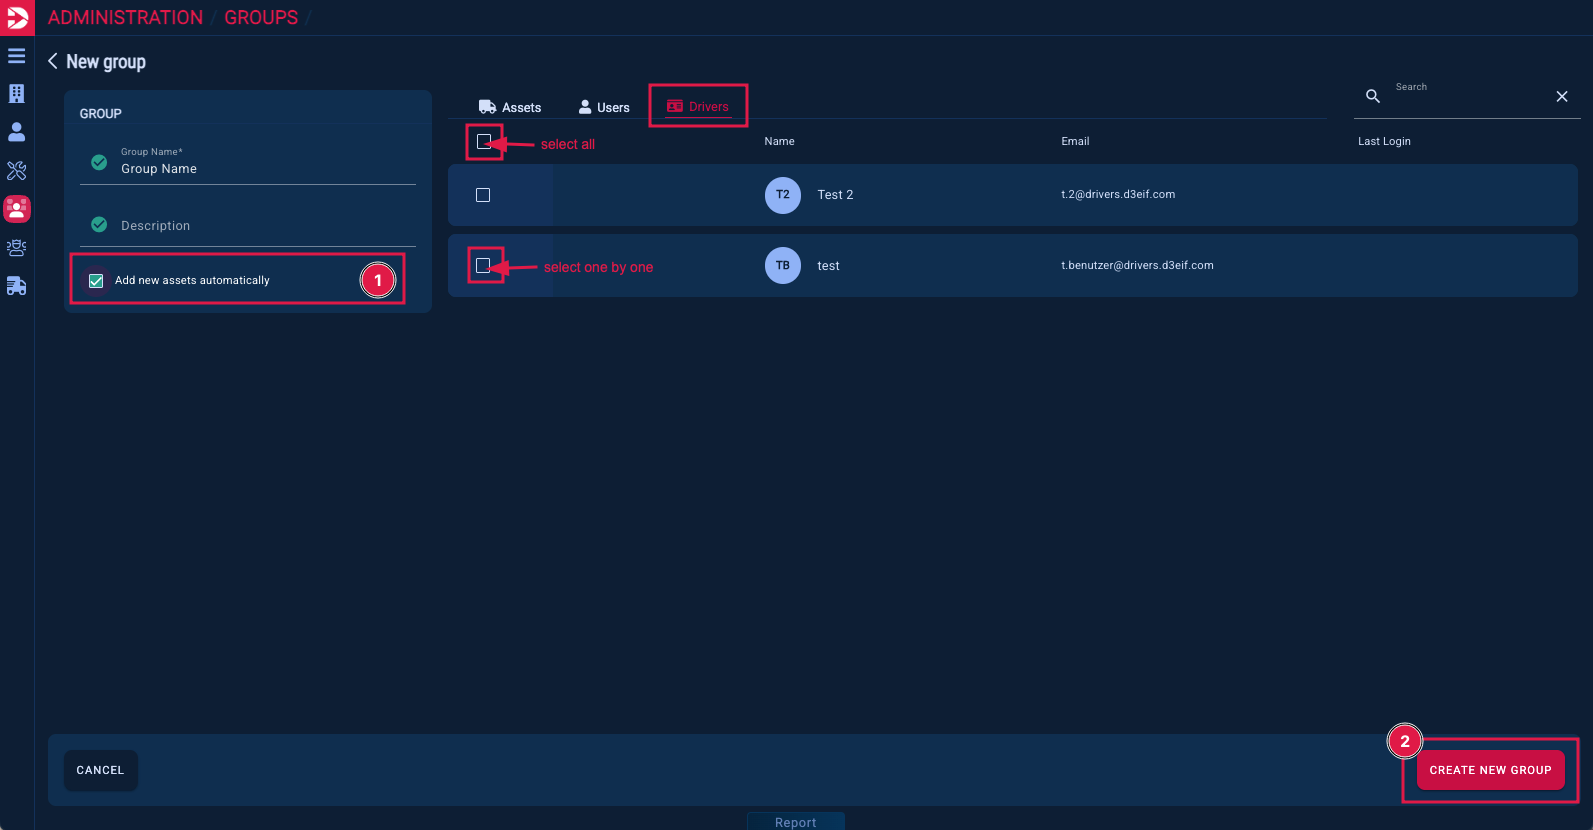
By enabling the “add new assets automatically ” button (1), you ensure that all vehicles either newly transmitted by your GPS system or shared with you, are automatically made available (in the real-time monitor and in the asset list).
To complete the group creation, simply click the “CREATE NEW GROUP” button (2) in the lower right corner of the overview.
Groups can be edited at any time after they have been created.
How this works is described here: How to edit groups