
Shipment Portal - Arrival Monitor
Here you will find all the instructions related to the “Shipment Portal”.
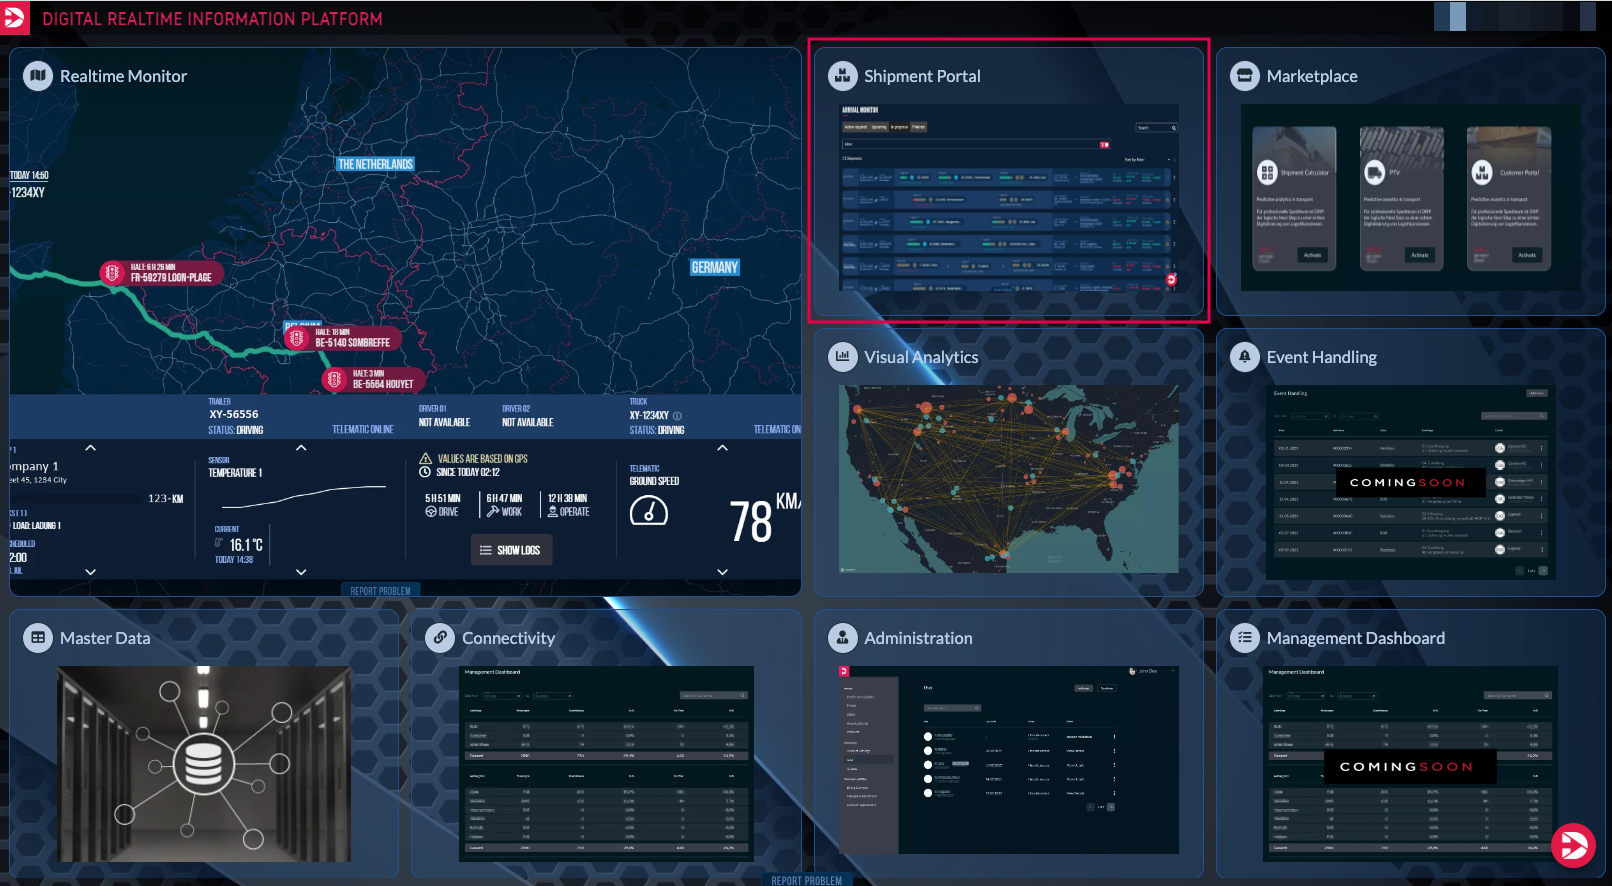
The shipment portal provides you with the ability to monitor and organize the status of your shipments, using the functions of the Arrival Monitor.
The “Shipment Portal” section must be clicked on the homepage to get to the Arrival Monitor.
Arrival Monitor
The top section of the arrival monitor contains a menu bar with several options (1) (action required, upcoming, in progress, finished) that allow you to sort the shipments by their status.
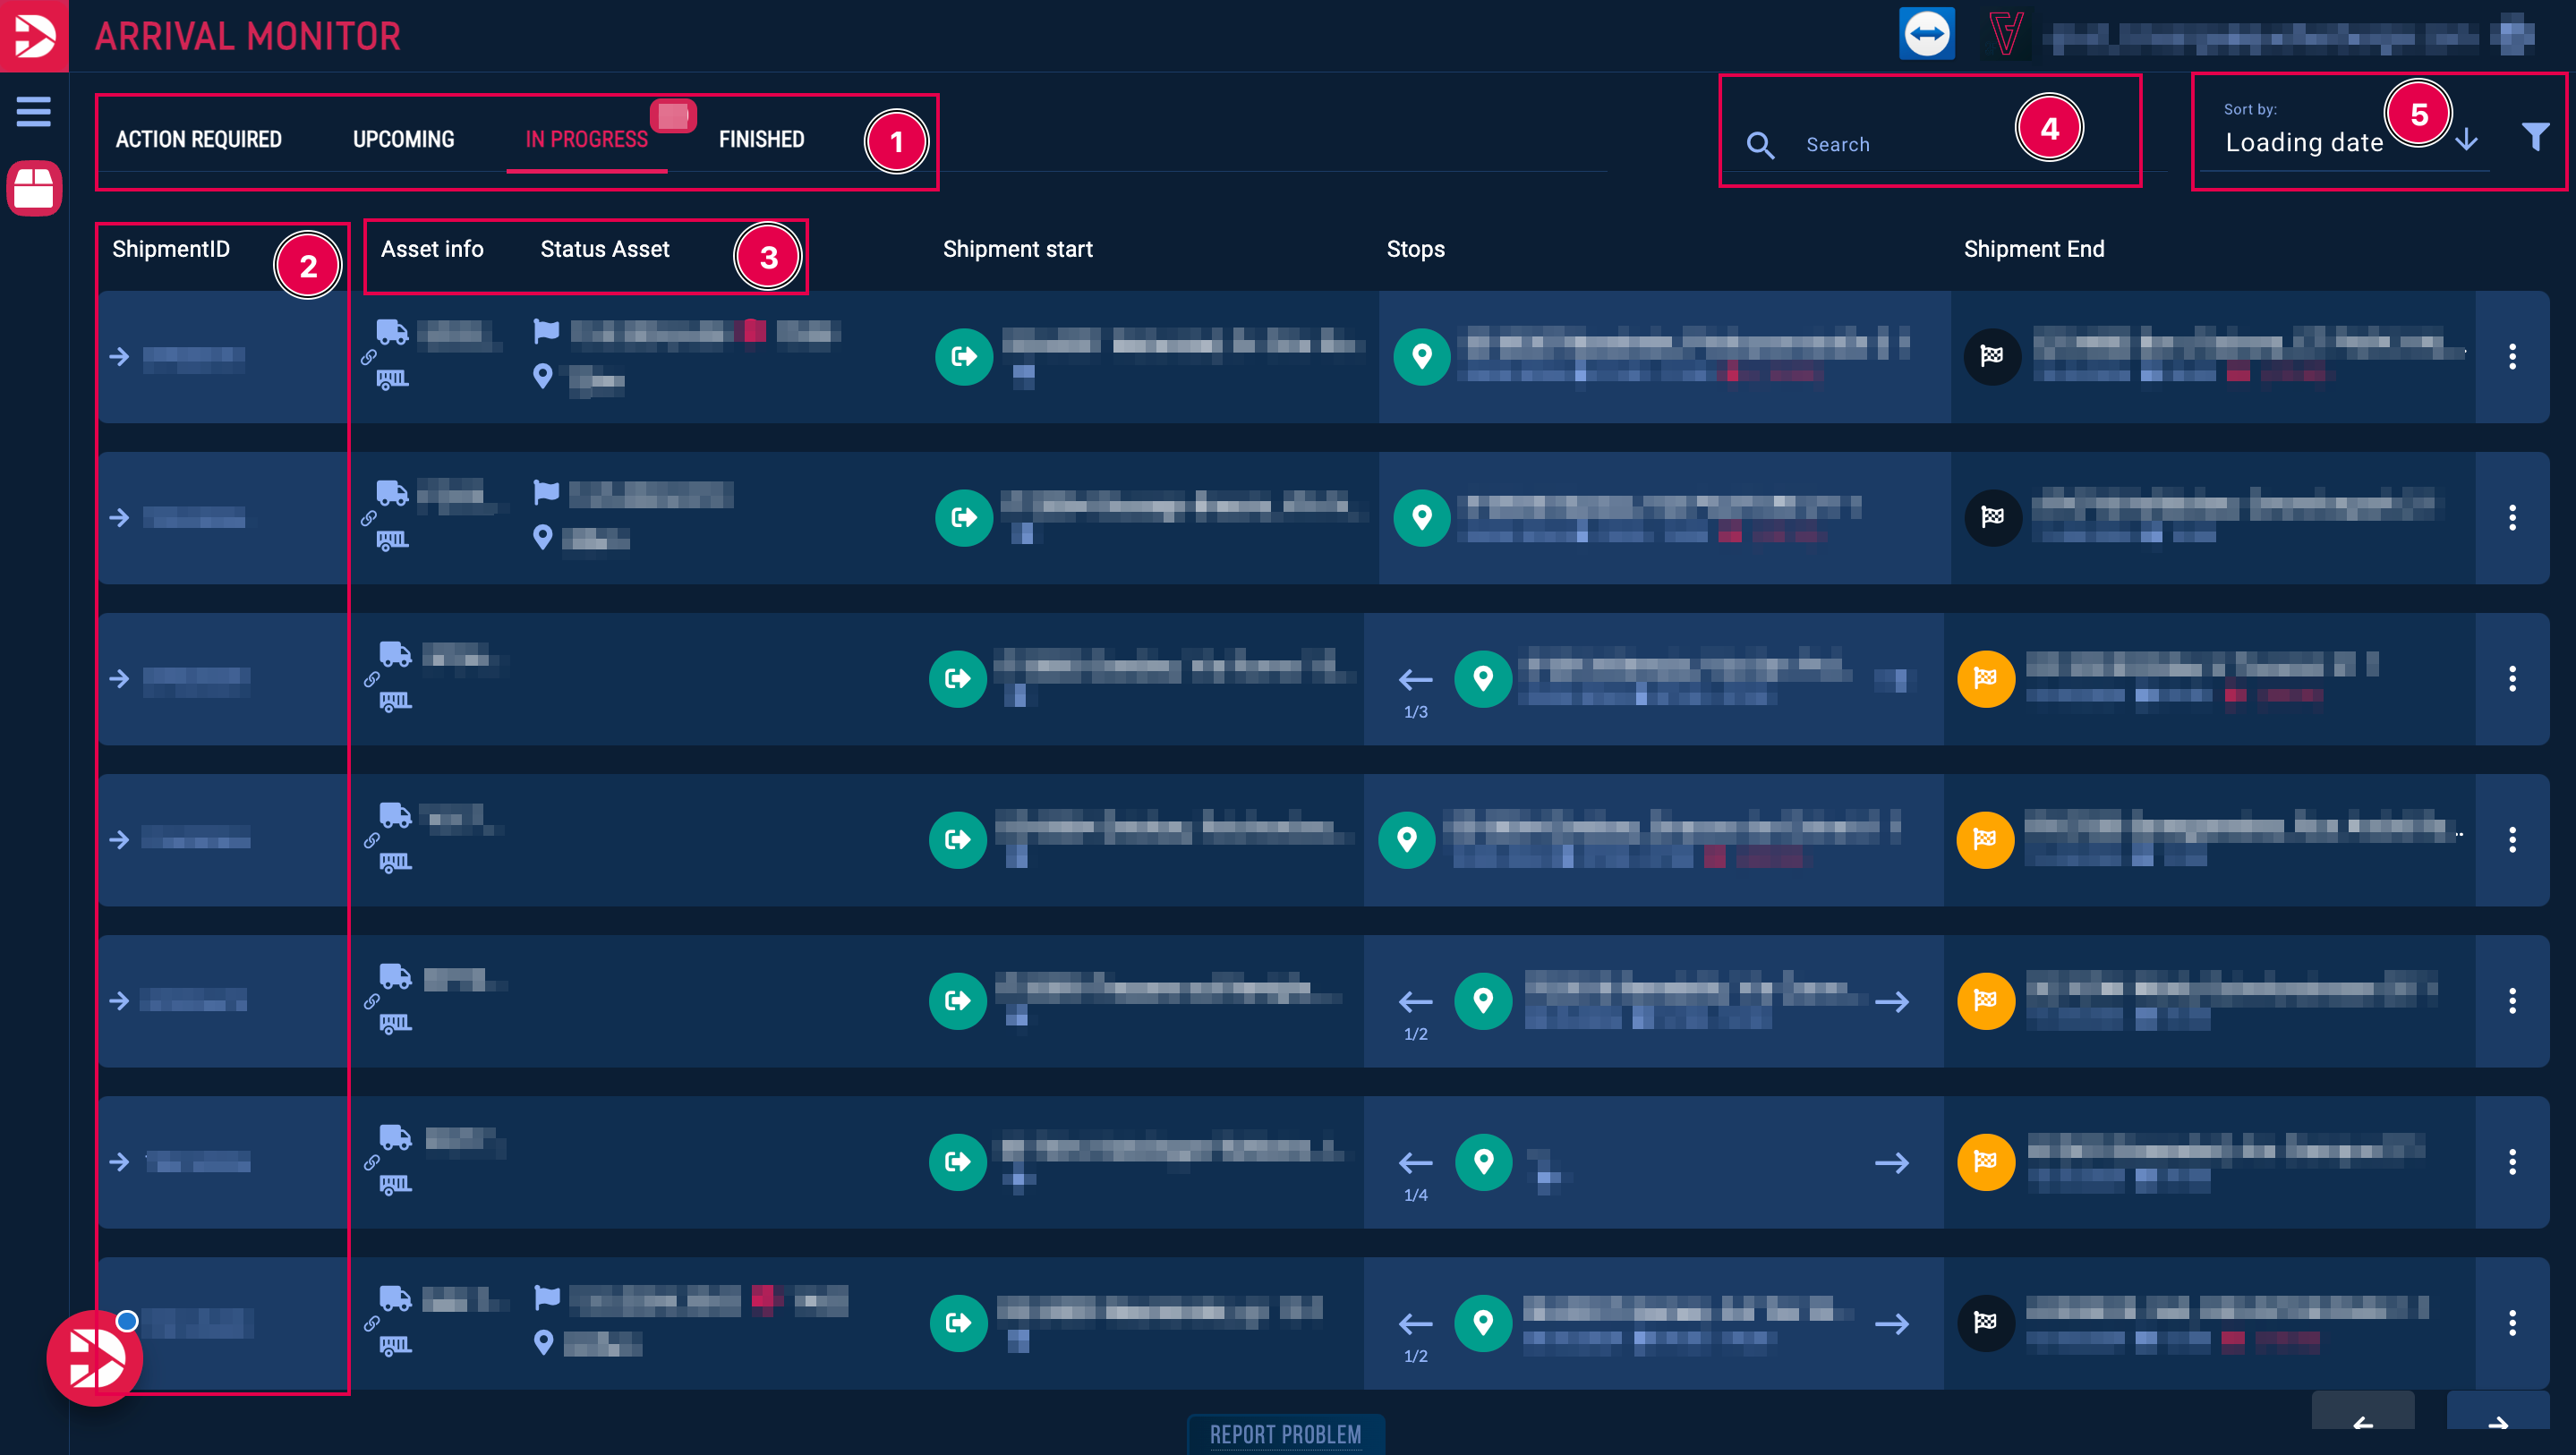
Each shipment has its own ID to which the respective information is assigned (2) - like the vehicle info (assigned vehicle) and the status of the vehicle (with the estimated time of arrival and the distance to the next stop) (3). You can search for ShipmentID or license plate using the search function (4) and you can sort them by loading date (5).
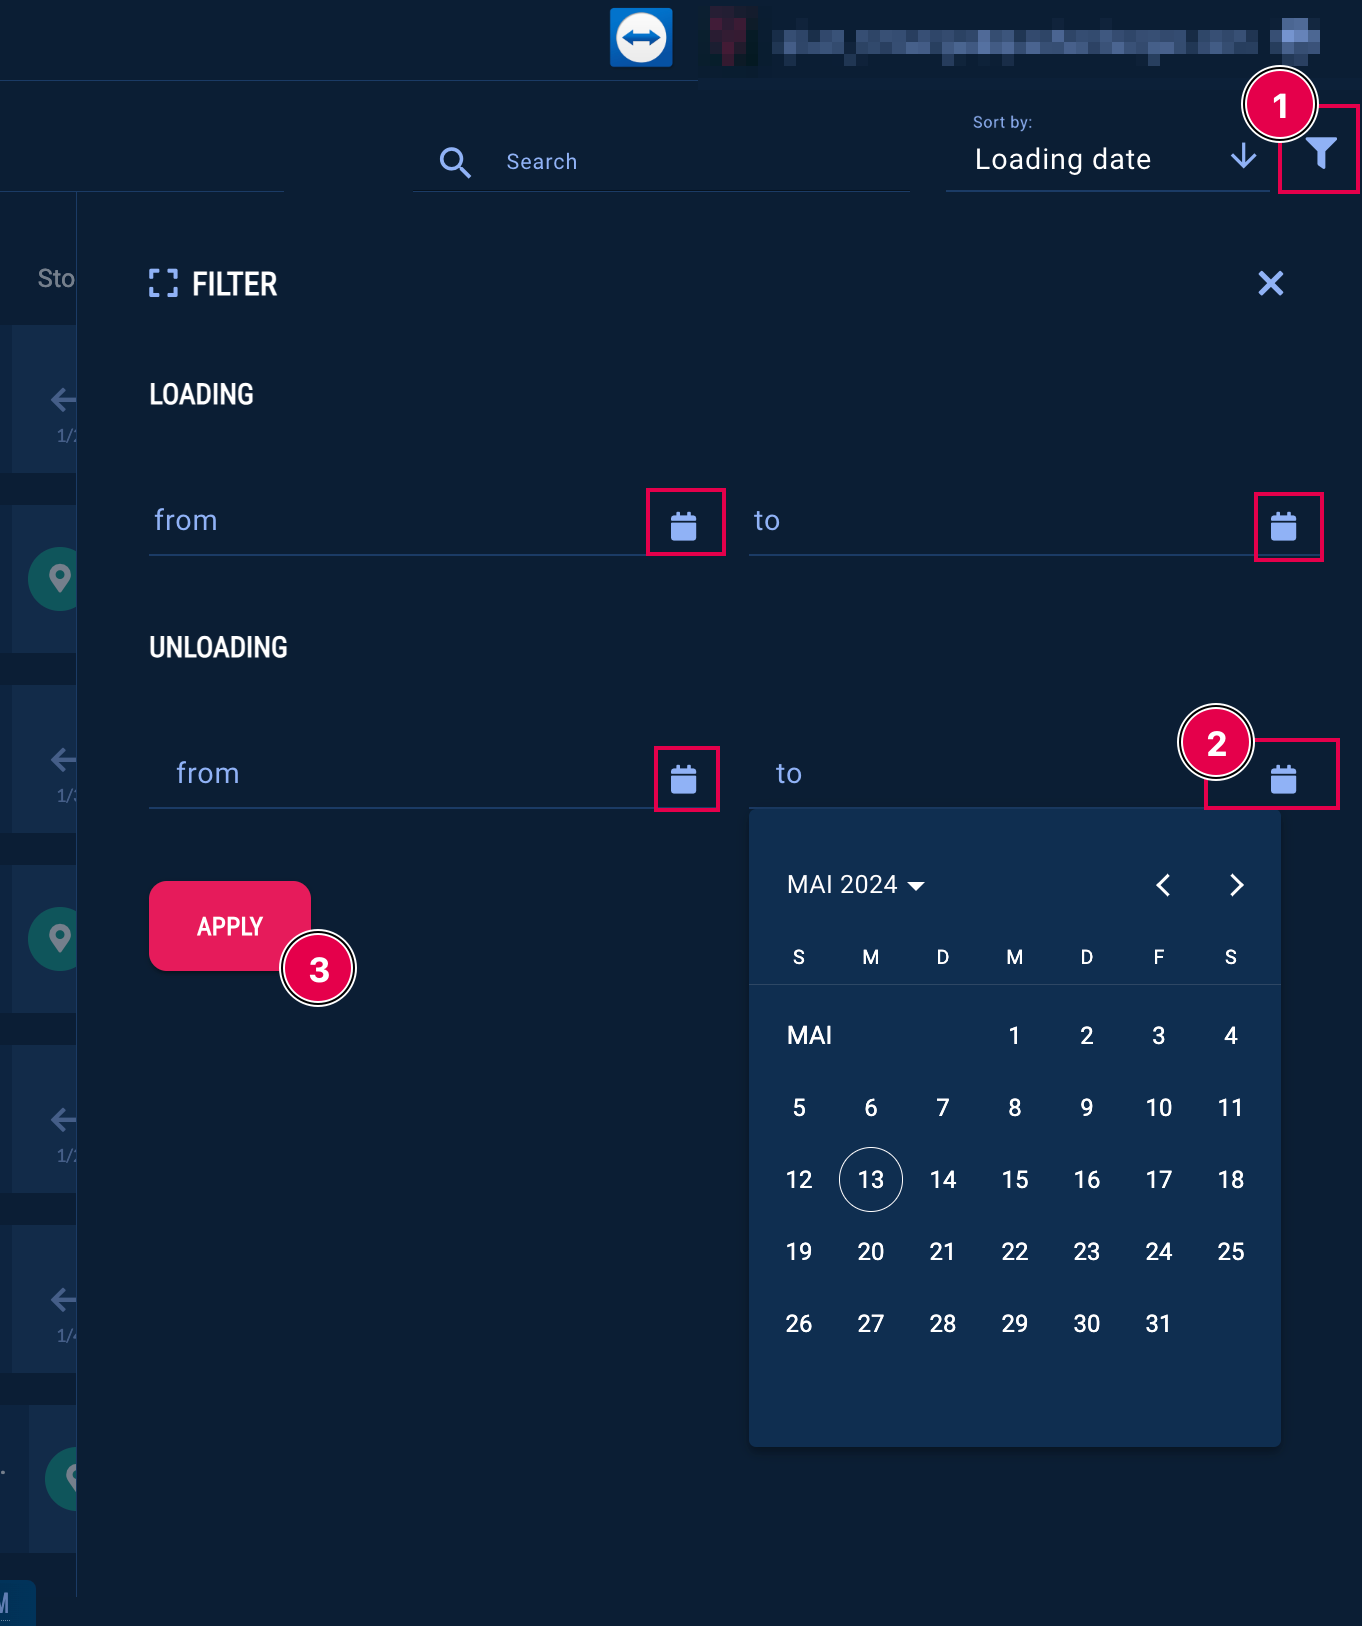
If you click on the filter symbol (1) a additional window will open, where you can filter the shipments by loading and unloading dates. To choose/ change the dates, click on the calendar symbol (2) and save the changes by clicking on “APPLY” (3)
The “Vehicle Status” (1) will show you the estimated time of arrival at and the distance to the next stop. Under “shipment start” (2) you can see the address where the shipment starts. Under “Stops” you will find the number of stops (3) and you can also switch between them, by clicking on the arrows to the left and right, next to the shown address. Unter the “Shipment End” (4) you can see the address where the shipment ends and the expected date and time.
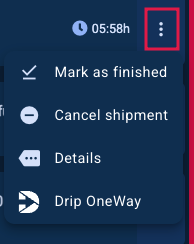
By clicking on the three dots at the End of the shipment overview (5) you have the options to mark it as finished, cancel the shipment and show details.
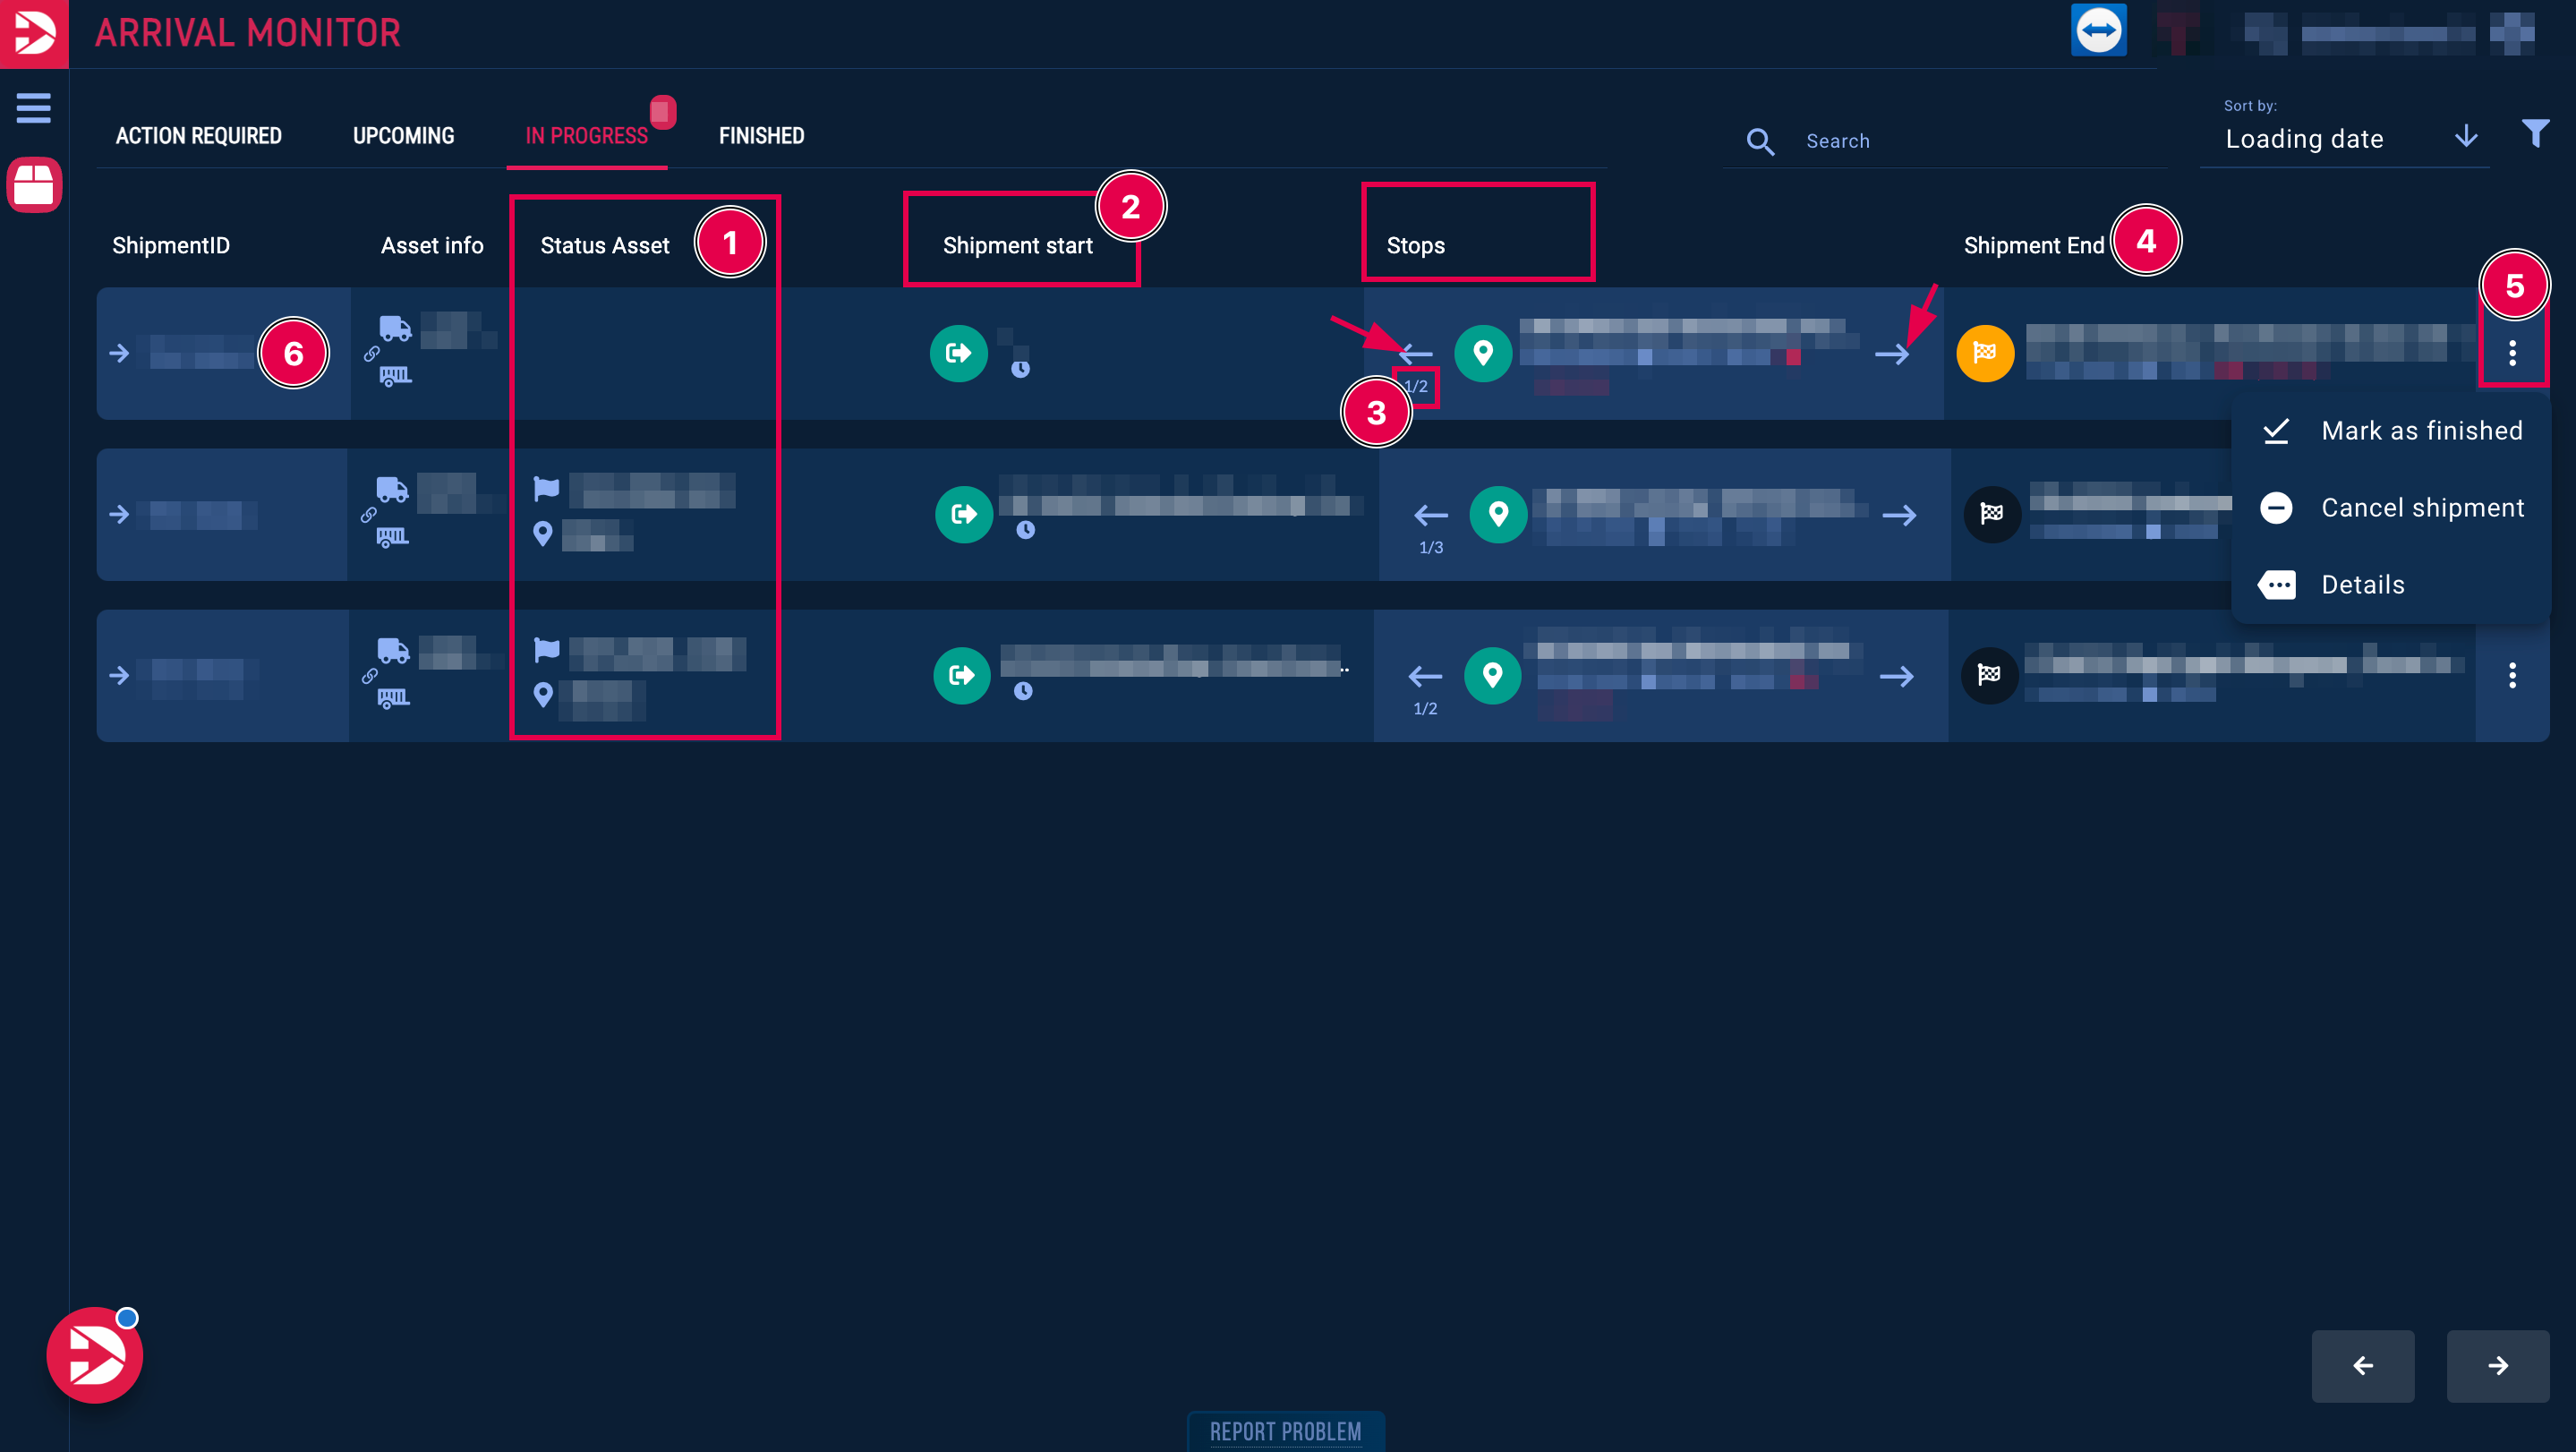
For more shipment details please click on the ShipmentID (6).
An overview will open with more shipment Information. Here you can see the stops (1) and the shipment end (2), the actual vehicle is shown (3) and the vehicle history (5) (if the load has been transshipped).
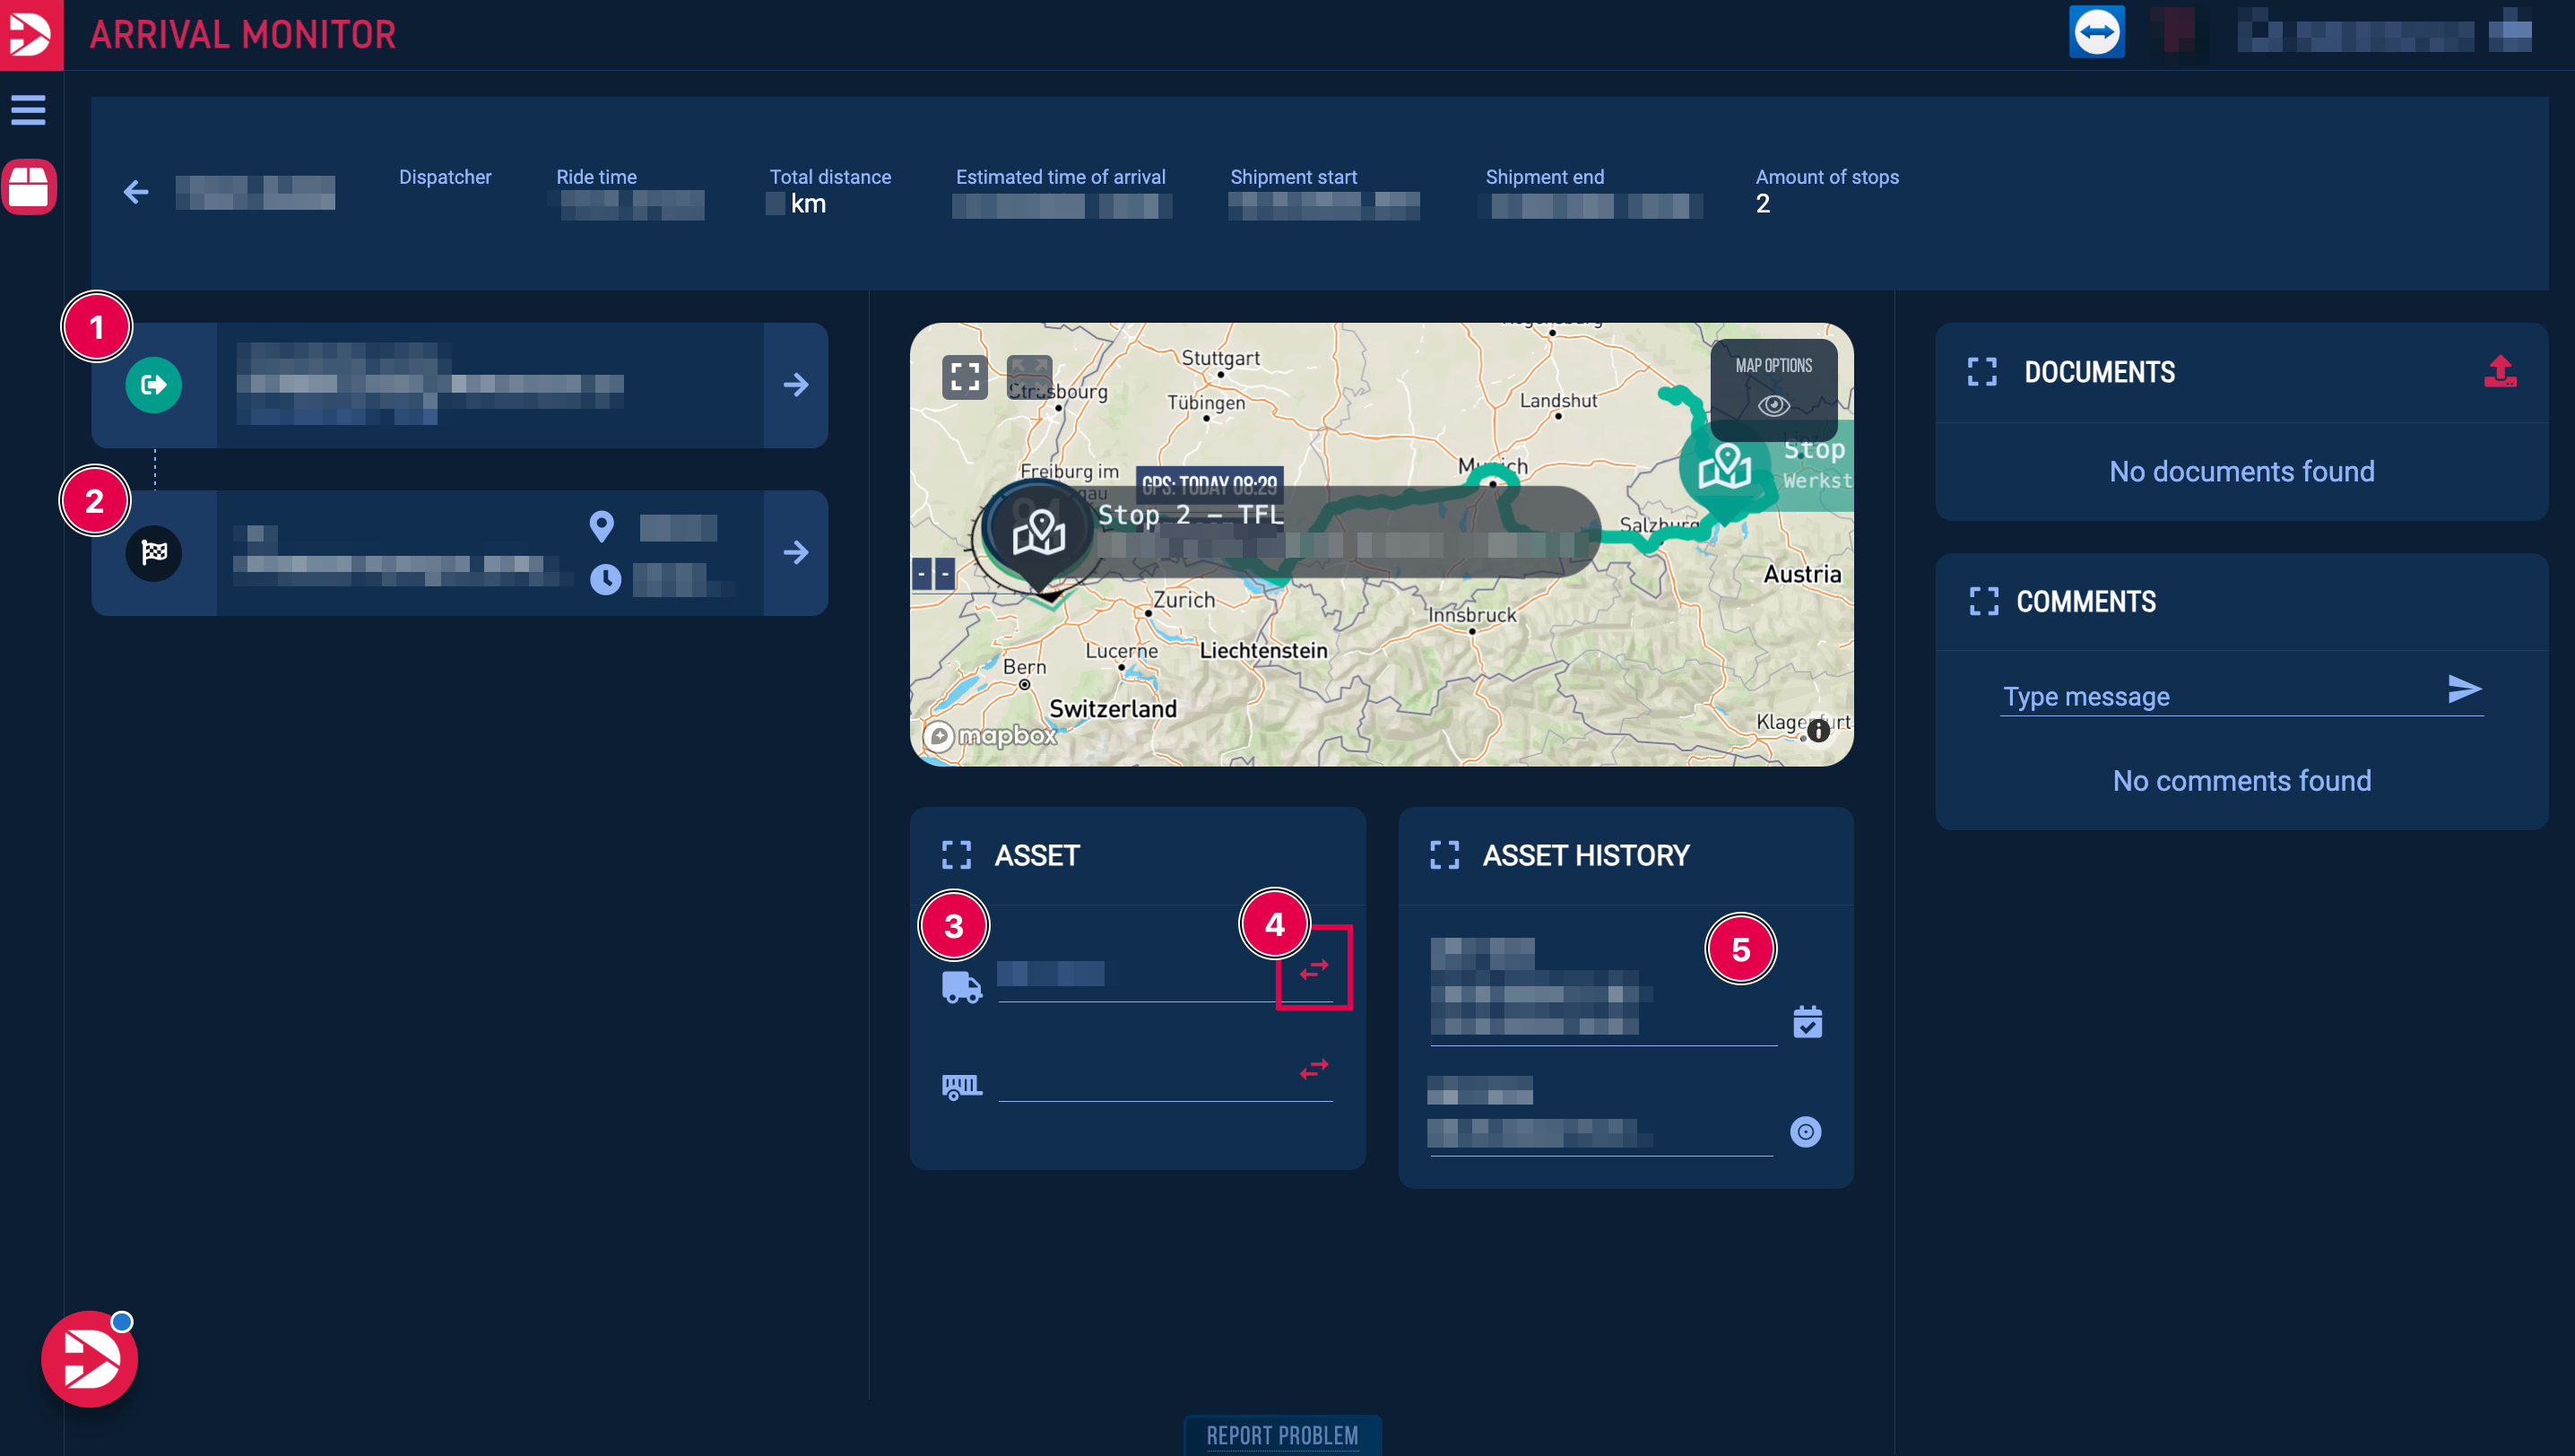
By clicking the opposing arrows icon (4), you can change the vehicle (e.g. if the load needs to be transferred to another vehicle while the tour is already in progress).
For more details, please refer to: Manual Vehicle Change in DRIP
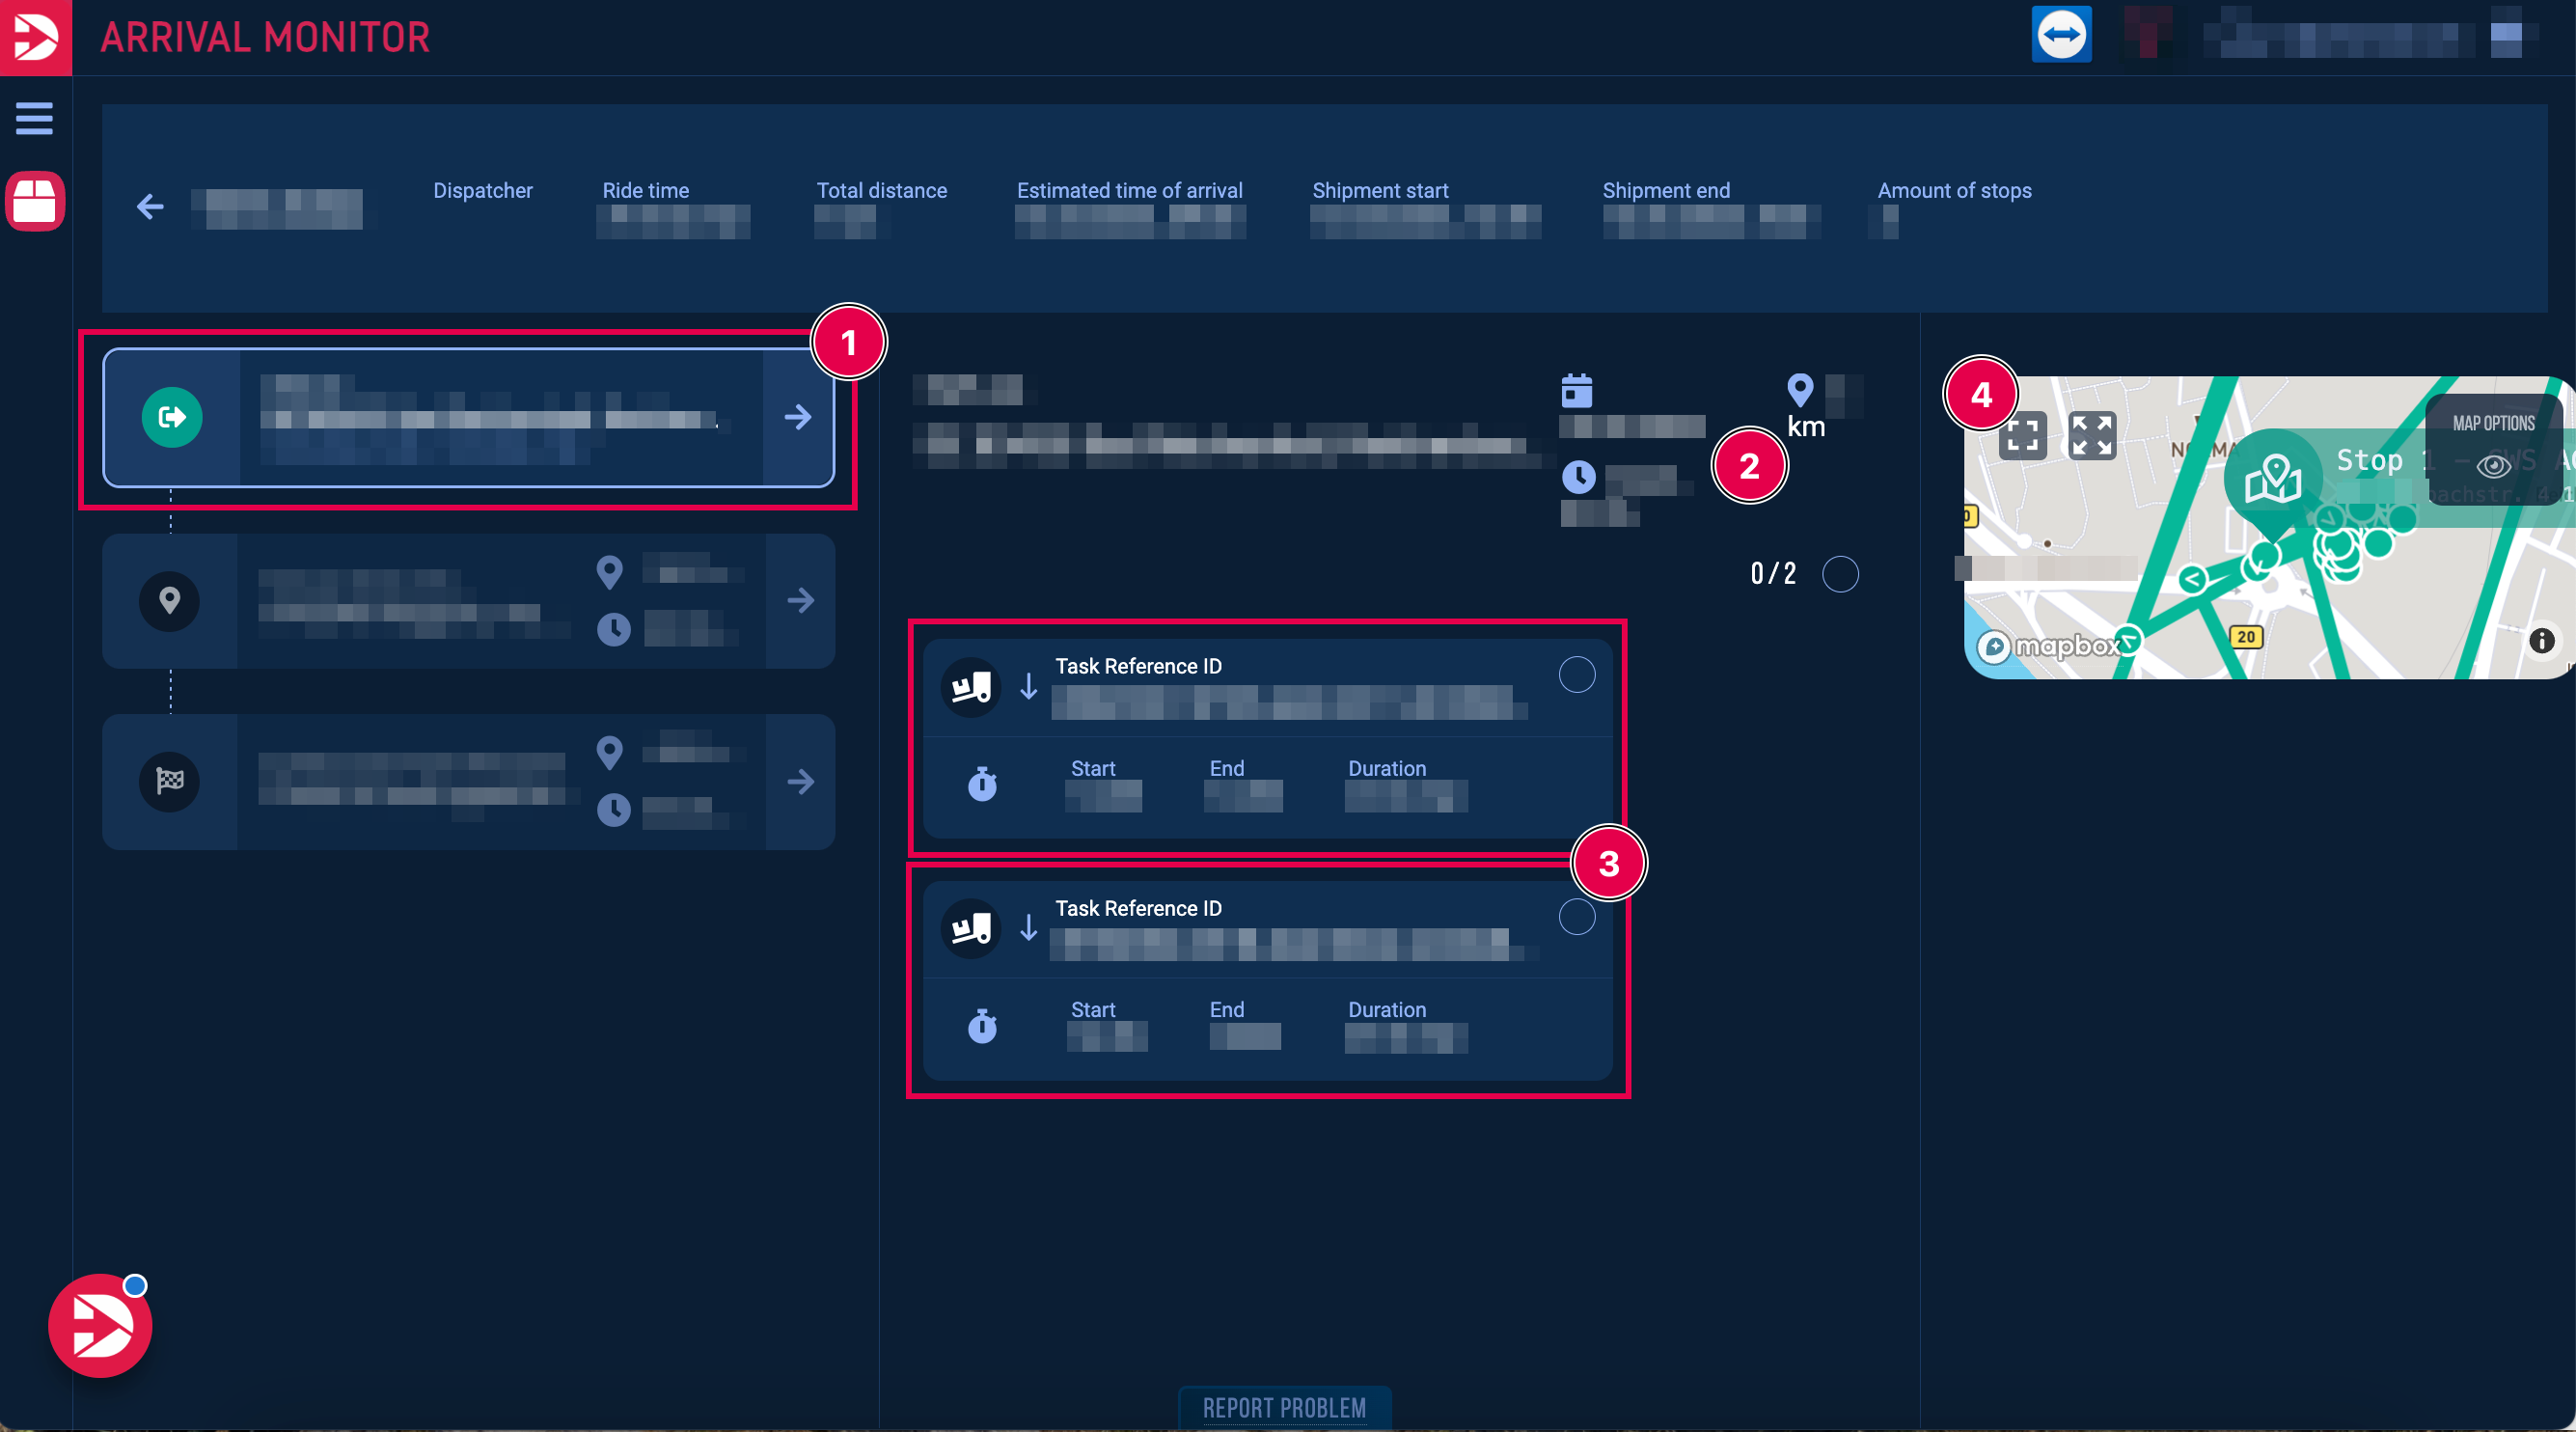
By clicking on one of the stops (1) will it will show you the planned time of arrival and the distance to the stop (2) and below you will find the related tasks (3).
On the right side, a map displays the selected stop location. (4) When maximizing the view, the vehicle’s route will also be shown, if available.

You can change the status of a consignment by clicking on the task symbol, as shown in the screenshot below.
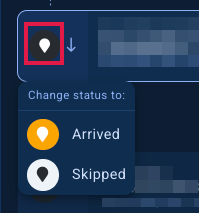
The status of a stopp can be changed in the same way.
Information on issues that influence tracking:
Under the “action required” tab, shipments are listed for which tracking may be affected.

If you click on a shipment there, a message describing the issue will be displayed in the top right-hand area. In this case, the licence plate was probably not entered correctly.

Under “Finished”, you can find all archived tours. If the status is shown entirely in green (as illustrated below), the tour was successfully tracked.
